Страници

сряда, 23 април 2014 г.

Реставрация на полилей с кристали и свещи (Altered Chandelier with crystals and candles)

Здравейте, преди време си купих един полилей със свещи, който реших да пребоядисам и преправя малко...Ето как изглежда сега:
Hi, some time ago I bought a chandelier with candles, and now I decided to redo it ... This is how it looks now:

А започнах оттук:
But I started from here:
боядисах го в  френско сиво, със зелена патина тук-там, поиграх си с комбинация от тези цветове:
I painted it in French gray, with a green patina here and there, and I played with a combination of these colors:
и след това най-трудоемката част беше с поставянето на кристалите, на всеки един от тел правих уши, за които да може да се закача, и ги нанизвах на различни низове, според това, как си го представях:
and then the most labor intensive part was the placing the crystals on several strings, according to how I imagined it:
отне ми повече от седмица, защото работех и по други проекти, резултата:
It took me more than a week because I was working on other projects,and the result:
и на светлина:
on the light:
и със свещи, обикновени бели, но ги направих с френски скрипт и брошка:
with plain white candles, but I made them with French script and brooch:

Страшно много ми харесва, и ще добавя към моя винтидж декор:)
I like it a lot, and I will add it to my vintage decorations :)

I'm linking in:

www.savvysouthernstyle.net http://jannolson.blogspot.com http://www.thevintagefarmhouse.com/ http://petitemichellelouise.blogspot.com// http://www.frommyfrontporchtoyours.com/ http://www.timewashed.com/ http://romantichome.blogspot.com/ http://www.jenniferrizzo.com http://www.shabbynest.blogspot.com/ http:// http://www.commonground-do.com/ http://rootedinthyme.blogspot.com/ http://www.thecottagemarket.com/ http://confessionsofaplateaddict.blogspot.com/ http://www.knickoftimeinteriors.blogspot.com/ http://www.cozylittlehouse.com/ http://www.astrollthrulife.net/ http://mariaelenasdecor.blogspot.com/ http://www.notjustahousewife.net/ http://nominimalisthere.blogspot.com/ linda-coastalcharm.blogspot.com http://etsycottagestyle.blogspot.com http://betweennapsontheporch.net www.dwellings-theheartofyourhome.com http://piecedpastimes.blogspot.com/ http://rosevignettes.blogspot.com/2014/02/fresh-cut-friday-february.html

неделя, 20 април 2014 г.

A Bit of Easter Decoration (Честит Великден)

Честит Великден, приятели!!
Искам да ви покажа част от елементите на моята празнична украса:)
Happy Easter, my friends!  
I want to show you some of the elements of my festive decorations :)

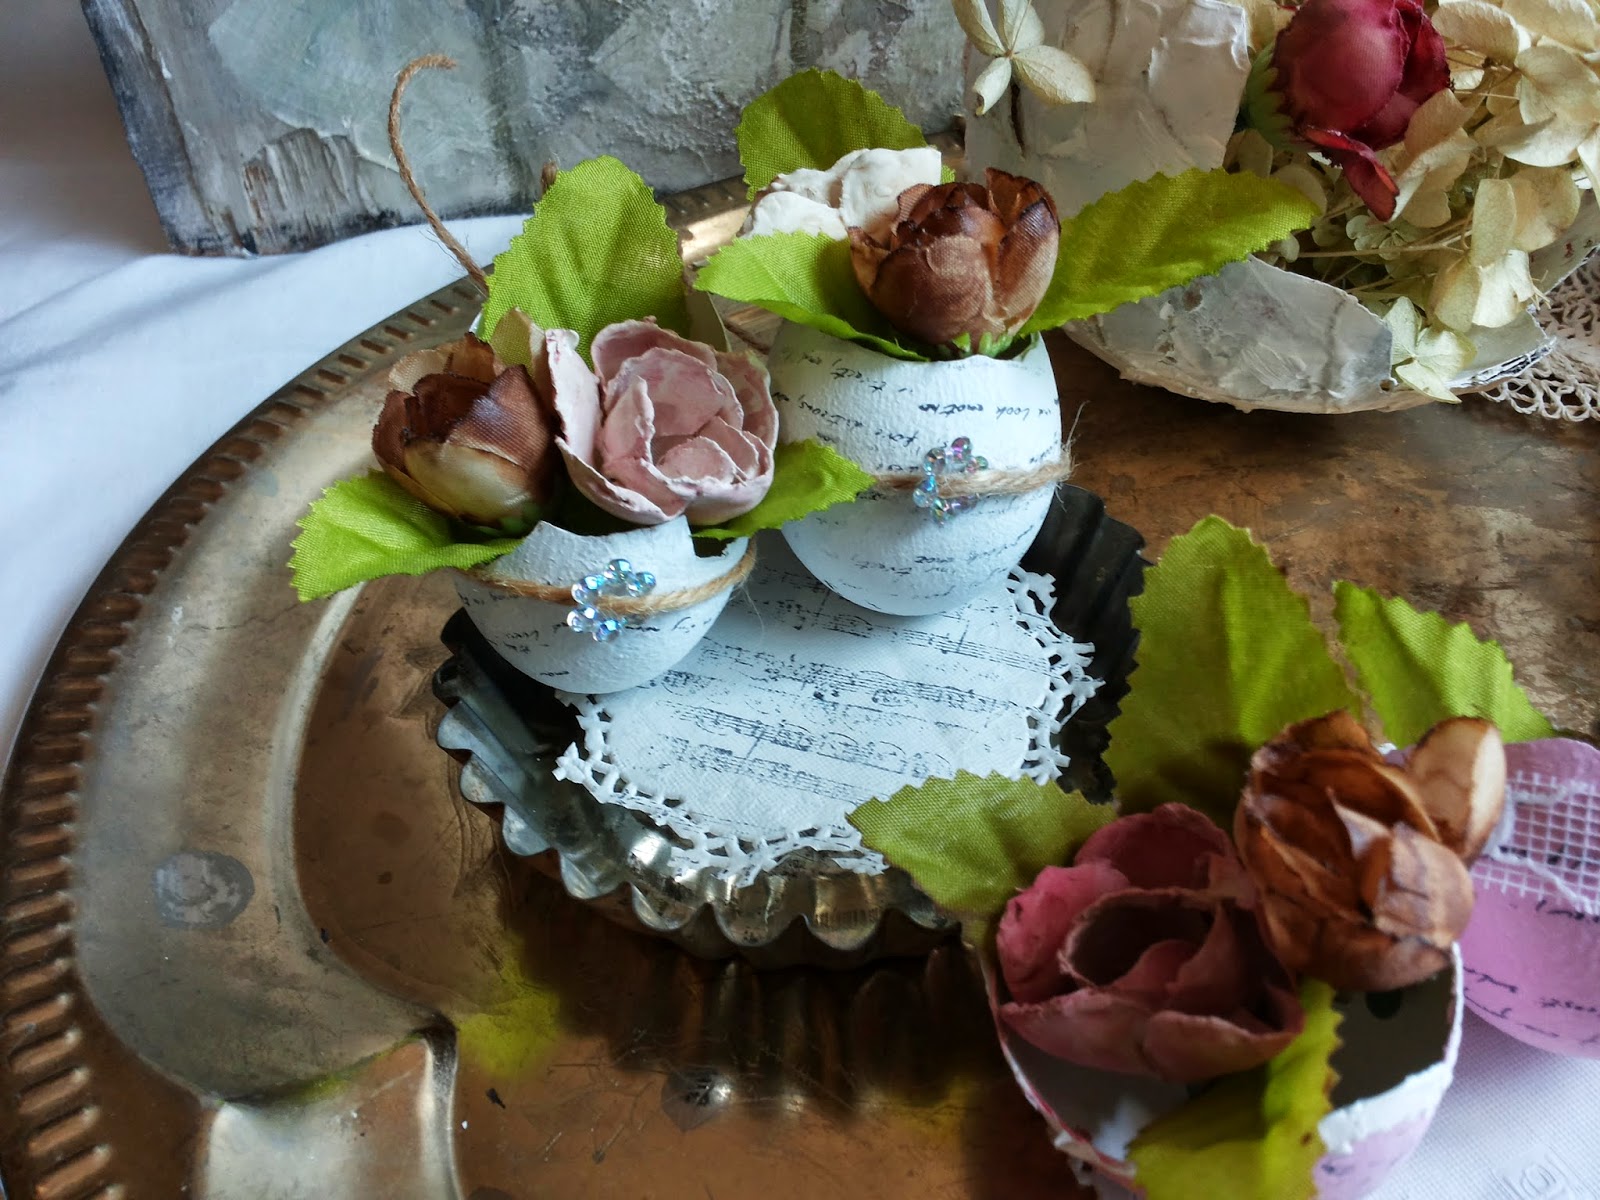
Това са елементите от украсата ми за масата
These are the elements for the decoration of my table
обожавам тези черупки с френски скрипт, цветя и брошка..
I love these shells with French script, flowers and brooch ..
и в розово
in pink too
и големите черупки, от папие маше, които запълних с изсушени цветя и черупки:
and the large shells,which I made from papier mache,and which I filled with dried flowers and shells:
и тук
and here
и накрая ще ви покажа и традиционните великденски яйца, които моето дете боядиса с майка ми вчера:
and finally I will show you the traditional Easter eggs which were dyed from my boy child and my mother yesterday:

Весели празници и хубаво настроение!!:)
Happy Holidays to you all :)

I'm linking in:


www.savvysouthernstyle.net http://jannolson.blogspot.com http://www.thevintagefarmhouse.com/ http://petitemichellelouise.blogspot.com// http://www.frommyfrontporchtoyours.com/ http://www.timewashed.com/ http://romantichome.blogspot.com/ http://www.jenniferrizzo.com http://www.shabbynest.blogspot.com/ http:// http://www.commonground-do.com/ http://rootedinthyme.blogspot.com/ http://www.thecottagemarket.com/ http://confessionsofaplateaddict.blogspot.com/ http://www.knickoftimeinteriors.blogspot.com/ http://www.cozylittlehouse.com/ http://www.astrollthrulife.net/ http://mariaelenasdecor.blogspot.com/ http://www.notjustahousewife.net/ http://nominimalisthere.blogspot.com/ linda-coastalcharm.blogspot.com http://etsycottagestyle.blogspot.com http://betweennapsontheporch.net www.dwellings-theheartofyourhome.com http://piecedpastimes.blogspot.com/ http://rosevignettes.blogspot.com/2014/02/fresh-cut-friday-february.html

четвъртък, 17 април 2014 г.

Как да направим състарена книга - стъпка по стъпка, втора част ( DIY aged vintage rustic wedding book - 2)


Ако следите блога ми, знаете, че преди време публикувах как да направим състарена книга, като подробно показах как съм направила корицата на моята. Можете да видите тук:
If you are following my blog, you know that some time ago I posted how you could make vintage book. You can see here details of  how I made the cover of mine:

http://martinel-art.blogspot.com/2014/04/diy-aged-vintage-wedding-book.html

Ако вашата цел е да направите декорация на книга, албум, тефтер, несесер или сватбена книга за пожелания, може да украсите по описания начин.
If your goal is to make a decorative book, an album,a notebook,a  pencil case or wedding wishes book, you can decorate in a descripted way.

Но аз исках да си направя книга за декорация, и затова продължих с украсата и на вътрешната част на книгата.
Вече имаме обгорени, намачкани листи, които да придават обем на разтворената книга. Разгърнете книгата по средата. Тези средни листи ще украсяваме, ако правим чист декупаж, може да се боядисат в бяло, и според вашите желания да залепите картинка, салфетка, или каквато техника искате да приложите, може да оформите средните страници като рамка, и да се сложат вътре снимки от събитие, за което е създадена...Възможностите се ограничават само от вашето въображение:)
But I wanted to make a book for decoration, and so, I continued to decorate the inside of the book.
We already have burned , crushed leaves, which to add volume to the open book . Unleash the book in the middle. These middle leaves we will decorate.If you want clean decoupage you can paint it in white, and you could glue an image , a napkin , or whatever technique you want to apply:)You can customize the middle pages as the average frame and place inside photos from the event , which was established ... The possibilities are limited only by your imagination :)
При моята книга, която наистина е много стара, на поне 40-50 години, аз искам да използвам естествено състарения вид и цвят на листите,  и затова ще декупирам директно върху буквите, подготвям си мотивите, като реших да обгоря краищата им също:
In my book, that really is very old, at least 40-50 years, I want to use naturally aged appearance and color of the leaves, so I will decoupage directly on the letters,I prepared the motives I decided to use, and burned their edges:
След залепяне, с релефната паста оформих с шаблони и с рисуване на ръка декоративните елементи  в ъглите:
After gluing them on the pages, I used stencils and hand-painted trim in the corners:
След това с акрилен прозрачен лак:
Then with acrylic transparent varnish:
и с патината навсякъде:
and patina everywhere:
докато получим това:
until we get this:


за по-античен вид, тук там минаваме с малко зелена патина по елементите, смес от тези три цвята:
for an antique look, we make green patina - a mixture of these three colors, and dry brush all over the relievo:

След това с по-плътен финишинг лак, и сме готови.
Може да се залепи по средата лента, дантелка, да се прегъне лист, или друго оформление.
Аз реших да сложа на моята цветя...
 Купих си обикновени изкуствени цветя:
Then denser finishing varnish, and we are ready.
You could stuck in the middle - band, lace, folded sheet and so on.
I decided to put in my flowers ...
  I bought a simple artificial flowers :
една част боядисах с кафе, а други с обикновени водни бои, цветовете според цветовете на книгата, имах няколко каменни цветя предварително направени, които също ще използвам:
some of them I dyed with coffee, others with simple watercolor colors with the colors of the book. I had  few stone flowers,I have made before and I will also use:


залепих с пистолет с горещ силикон и ето я напълно готова:
I glued the flowers  with hot gun  and here it is:


I'm linkimg in:


www.savvysouthernstyle.net http://jannolson.blogspot.com http://www.thevintagefarmhouse.com/ http://petitemichellelouise.blogspot.com// http://www.frommyfrontporchtoyours.com/ http://www.timewashed.com/ http://romantichome.blogspot.com/ http://www.jenniferrizzo.com http://www.shabbynest.blogspot.com/ http:// http://www.commonground-do.com/ http://rootedinthyme.blogspot.com/ http://www.thecottagemarket.com/ http://confessionsofaplateaddict.blogspot.com/ http://www.knickoftimeinteriors.blogspot.com/ http://www.cozylittlehouse.com/ http://www.astrollthrulife.net/ http://mariaelenasdecor.blogspot.com/ http://www.notjustahousewife.net/ http://nominimalisthere.blogspot.com/ linda-coastalcharm.blogspot.com http://etsycottagestyle.blogspot.com http://betweennapsontheporch.net www.dwellings-theheartofyourhome.com http://piecedpastimes.blogspot.com/ http://rosevignettes.blogspot.com/2014/02/fresh-cut-friday-february.html

четвъртък, 10 април 2014 г.

Винтидж рози ( Vintage roses candle and candlestick)

Винаги ми е било интересно да правя свещи с техниката декупаж, сега отново ми се удаде тази възможност, направих свещ, свещник за нея, и комбинирах с една бутилка и едно от великденските ми яйца, ето резултата:
I've love to decorate white candles with decoupage technique, now again I have made one and a candlestick for her, and combined with a bottle I have decoupaged before, and one of my Easter eggs, here is the result:
свещта:
the candle
 винтидж свещ
vintage candle
състарена с декупаж 
decoupaged and aged
Свещника по-отблизо: 
Candlestick more closely:

Да не пропуснем и великденското яйце:
and the easter egg
  
Стана хубав винтижд комплект за подарък и декорация: 
It's an easter vintagevignette, perfect for a gift too..

I'm linking in:


www.savvysouthernstyle.net http://jannolson.blogspot.com http://www.thevintagefarmhouse.com/ http://petitemichellelouise.blogspot.com// http://www.frommyfrontporchtoyours.com/ http://www.timewashed.com/ http://romantichome.blogspot.com/ http://www.jenniferrizzo.com http://www.shabbynest.blogspot.com/ http:// http://www.commonground-do.com/ http://rootedinthyme.blogspot.com/ http://www.thecottagemarket.com/ http://confessionsofaplateaddict.blogspot.com/ http://www.knickoftimeinteriors.blogspot.com/ http://www.cozylittlehouse.com/ http://www.astrollthrulife.net/ http://mariaelenasdecor.blogspot.com/ http://www.notjustahousewife.net/ http://nominimalisthere.blogspot.com/ linda-coastalcharm.blogspot.com http://etsycottagestyle.blogspot.com http://betweennapsontheporch.net www.dwellings-theheartofyourhome.com http://piecedpastimes.blogspot.com/ http://rosevignettes.blogspot.com/2014/02/fresh-cut-friday-february.html

Сватбена декорация в розово, праскова, слонова кост и златно( Wedding decoration from paper flowers)

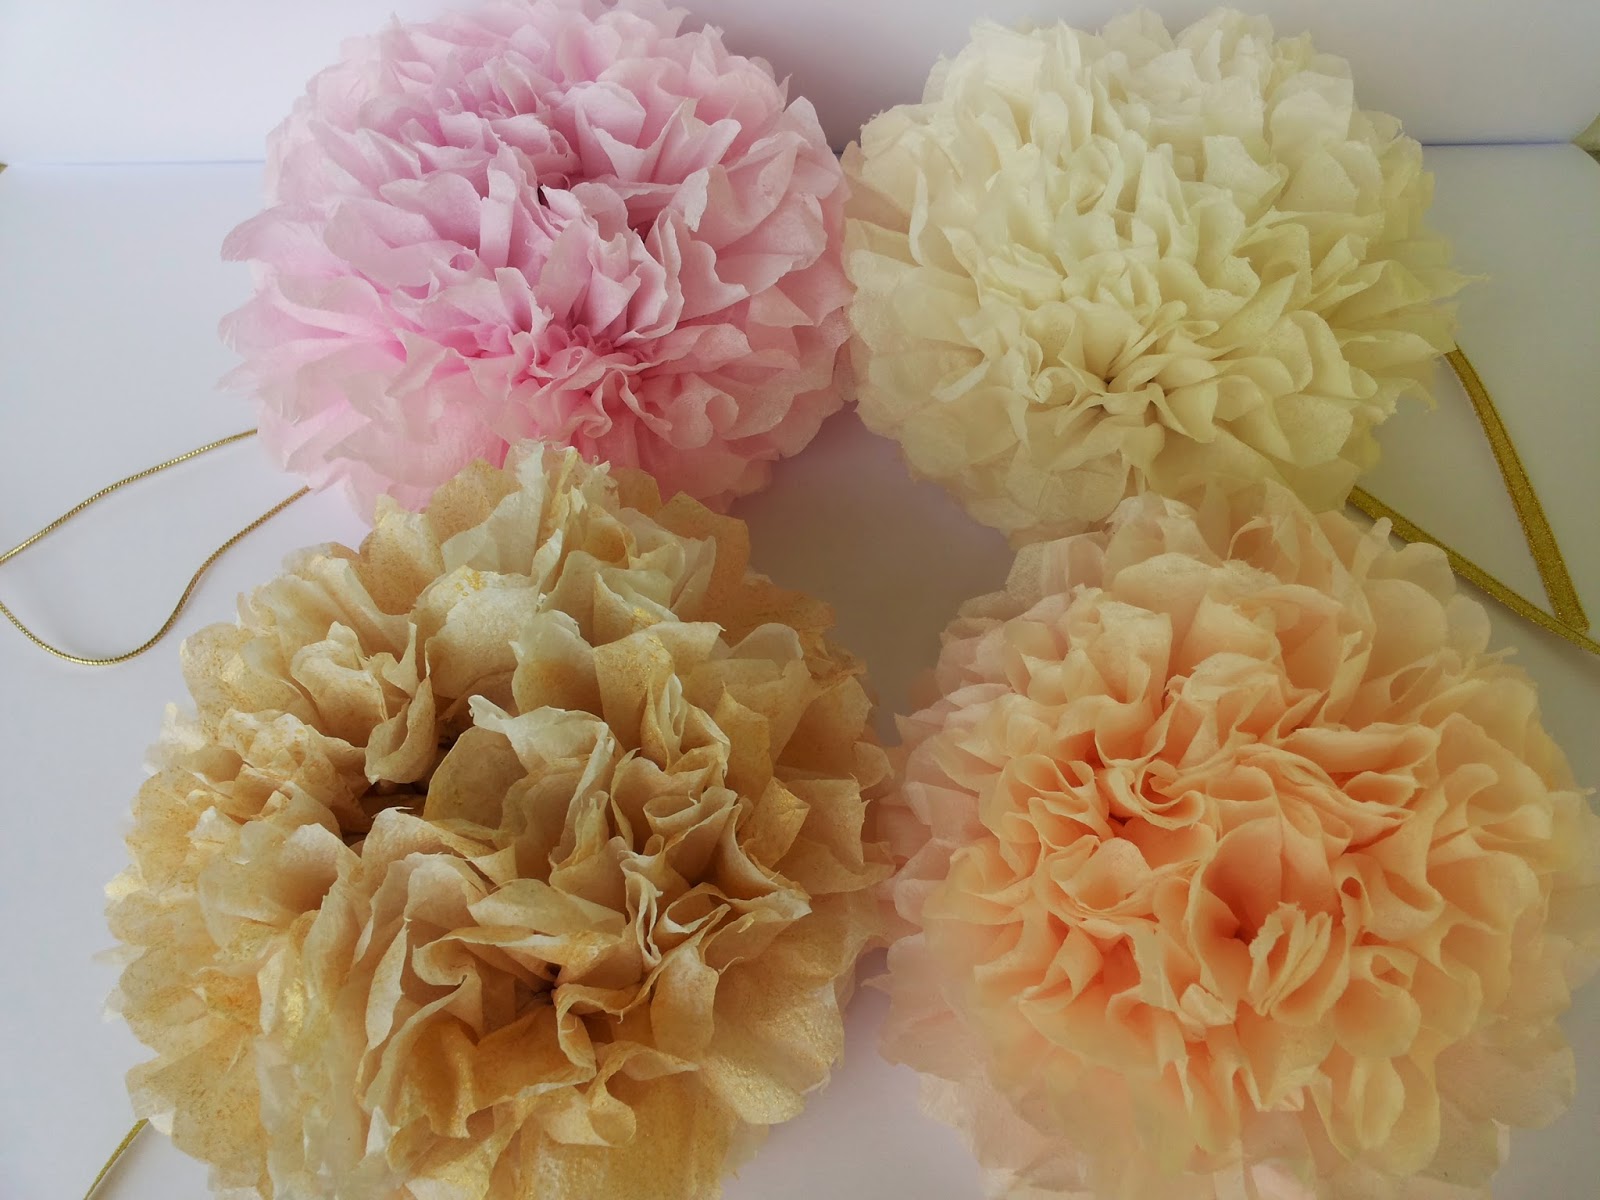
Здравейте, моят последен завършен проект, беше да направя декорация на една сватба, с помпони в бледо розово, бледо прасковено, слонова кост и златно...Изработката беше бавна и сложна, както знаете аз ръчно оцветявам хартията в желаните цветове...Резултата:
Hello, my last completed project was to decorate a wedding.. with pompoms in pale pink, pale peach, ivory and gold ... The work was slow and hard, as you know I hand dye the paper in desired colors ... The result :


 Направих и букет за булката или за шаферките, а защо не и за украса за масите, или окачен и за украса на столовете...Всъщност оставям на вашето въображение:
I made a bouquet for the bride or bridesmaids, and why not to decorate the tables, or  to decorate the chairs ... In fact, I leave it  to your imagination:
С малки перлички и брошки
With little pearls and brooches
Перфектният сватбен букет, за винтидж сватба
The perfect wedding bouquet for a vintage wedding

Красота, и романтика в едно...
Beauty and romance  ...
И като завършек и гирляндите, които направих за тази моя, любима булка:
And the garlands I made for my beloved bride, I had shown them to you before:
 За украса на сватбената арка
To decorate wedding arch

И сега най-интересното, имам обещание да получа снимки от сватбената декорация, и ако, и когато това стане, със сигурност ще ги покажа и на вас, мои мили приятели:)
And now the most interesting, I have promise to receive pictures of the wedding decorations, and if and when that happens, I will  show them to you, my dear friends :)

I'm linking in:

www.savvysouthernstyle.net http://jannolson.blogspot.com http://www.thevintagefarmhouse.com/ http://petitemichellelouise.blogspot.com// http://www.frommyfrontporchtoyours.com/ http://www.timewashed.com/ http://romantichome.blogspot.com/ http://www.jenniferrizzo.com http://www.shabbynest.blogspot.com/ http:// http://www.commonground-do.com/ http://rootedinthyme.blogspot.com/ http://www.thecottagemarket.com/ http://confessionsofaplateaddict.blogspot.com/ http://www.knickoftimeinteriors.blogspot.com/ http://www.cozylittlehouse.com/ http://www.astrollthrulife.net/ http://mariaelenasdecor.blogspot.com/ http://www.notjustahousewife.net/ http://nominimalisthere.blogspot.com/ linda-coastalcharm.blogspot.com http://etsycottagestyle.blogspot.com http://betweennapsontheporch.net www.dwellings-theheartofyourhome.com http://piecedpastimes.blogspot.com/ http://rosevignettes.blogspot.com/2014/02/fresh-cut-friday-february.html

събота, 5 април 2014 г.

Как да направим състарена книга, стъпка по стъпка (DIY aged vintage rustic wedding book)

Здравейте приятели, този път реших да покажа един от проектите си стъпка по стъпка...Може би за някой ще бъде интересно:)
В момента се занимавам с направата на една състарена книга.Може би много от вас знаят как се прави и този пост ще им се стори излишен, но дано да бъда полезна на някого.
Проекта ще бъде в две части, сега ще обясня някои от вариантите за корицата, а при следващи публикации ще покажа как би могла да се направи и вътре...
Направата на  корицата, може да се използва като вариант и за рецептурна книга, за тефтер, тетрадка, сватбена книга с пожелания, албум и каквото друго се сетите.
В моя вариант ще използвам готовата книга за декорация, предвидено е да  стои отворена, ще обясня всички стъпки, а вие по ваше желание прескачайте ненужните.Резултата:
Hello friends , this time I decided to show one of my projects step by step ... Maybe for someone this will be interesting :)
At the moment, I'm making a vintage book.May be many of you know how to do this and the post will seem redundant , but I hope to be helpful to someone.
The project will be in two parts ,now I'll explain some of the options for the cover , and in subsequent posts I will show how it can be done inside ...
Making the cover can be used as an option for a recipe book, a notebook , wedding book with wishes , wedding album and whatever else you can remember.
In my version I will use the finished book for decoration,I intend it to stay open , I will explain all the steps and you can skip something.The result :
Вземете една книга, разделете я на две, и мокрейки ръце във вода, намачкайте всички страници, оставете да изсъхне.
След като изсъхне, със свещ или запалена ароматна пръчица, обгорете тук-там краищата на страниците от всички страни.
Take a book or a notebook, divide it in two, and with wet hands , mash all pages, and leave to dry.
Once dry, with a lit of a candle or an aromatic stick, burn  here and there all the pages from all the sides.


Корицата боядисайте с бяла акрилна боя или неразреден латекс в бяло...Минете два пъти, ако искате да има повече релеф, може да добавите в една купичка латекс плюс една лъжица гипс, за да се сгъсти латекса...Така и ще се виждат по-добре четките, докато боядисвате...
The cover you could paint with white acrylic paint or undiluted white latex ... Go twice if you want to have more relief, you can add one tablespoon  plaster to one cup paint if you want to thicken the latex ... so you will see better the brushes while painting ...

Аз използвах акрилен лак, цвят орех и боядисах два пъти върху бялото..Получи се естествено състарено и много приятно:
I used acrylic lacquer, colour- walnut and painted twice over the white .. It was naturally distressed and very nice:

От тънък талашит си изрязах два правоъгълника, не е задължително формата да е съвсем еднаква или правилна, минах ги с малката газова горелка, която имам:
From a thin chipboard I cutted out two rectangles /not necessarily a perfect form/, and I passed them with small gas burner that I have:
При желание да имате един съвсем изчистен десен, това е достатъчно, може да се залепят върху корицата, и вашия албум е готов...
Но аз исках да пораздвижа малко, затова ще добавим тук-там малко розички, за цвят, и за шеби-шик:)От разни салфетки, си избрах едни избеляли рози, откъснах желаните мотиви, и ги залепих  там, където прецених:
If you wish to have a very simple design, that's enough, you can stick them on the cover, and your album is ready ...
But I wanted something more, so I'll add here and there a little roses for color and shabby chic effect:) From some napkins, I chose some faded roses, and cut off the motives and glued them where I thing it would look nice:
Предварително си подготвих заготовки, пак от моят тънък талашит, на които с пирографа може да се изпише послание, пожелание или запомняне на дата и имена на младоженци, рожден ден и т.н.
I priorily completed circle and a heart, again from my thin chipboard. With pyrography can display a message or a wish,or Save the date and names of the couple, birthday date, etc.
След залепяне на салфетките, изсъхване, още един път с моят лак с цвят на орех:
After gluing napkins, dry one more time, and again the wallnut laquer: 
Сега остава да се залепят дъсчиците към корицата и сме готови, но аз реших да добавя още нещо- малко дантелка, аз съм влюбена в дантелите, затова залепяйки с пистолет с горещ силикон корицата, в двата края добавих по ивичка дантелка, за романтика и малко лукс:)
Now I have to glue the blocks to cover and we are ready, but I decided to add something else- little lace, I'm in love with laces, so I glue with a  hot silicone gun the covers, and at both ends I added edging of a lace for romance and a little luxury :)


Ако това е сватбен албум, и вътре ще се пишат пожелания, или лепят снимки, може да се направи по една дупка в средата на двете корици и да се сложат връзки, с които да се завръзва, пък и за по-старинен вид..Аз привързах с канап, за да покажа как би изглеждал затворен:
If this is a wedding album, and there will be written wishes or glued pictures you can make a hole in the middle of both covers and  put some ties, and even for a vintage look .. I used a sofas to show how it looked closed:

Е, приятели, вече си имаме една красиво оформена, състарена корица...Ако ви е интересно и искате да видите как ще оформим вътрешната част, проследете блога ми, скоро ще пусна и втората част:)
Целувам ви....
Well, folks, we already have a beautifully shaped vintage cover ... If you're interested and want to see how to shape inside, follow my blog,I will soon launch the second part :)
xoxoxo ....
Marinela

I'm linking in:

www.savvysouthernstyle.net http://jannolson.blogspot.com http://www.thevintagefarmhouse.com/ http://petitemichellelouise.blogspot.com// http://www.frommyfrontporchtoyours.com/ http://www.timewashed.com/ http://romantichome.blogspot.com/ http://www.jenniferrizzo.com http://www.shabbynest.blogspot.com/ http:// http://www.commonground-do.com/ http://rootedinthyme.blogspot.com/ http://www.thecottagemarket.com/ http://confessionsofaplateaddict.blogspot.com/ http://www.knickoftimeinteriors.blogspot.com/ http://www.cozylittlehouse.com/ http://www.astrollthrulife.net/ http://mariaelenasdecor.blogspot.com/ http://www.notjustahousewife.net/ http://nominimalisthere.blogspot.com/ linda-coastalcharm.blogspot.com http://etsycottagestyle.blogspot.com http://betweennapsontheporch.net www.dwellings-theheartofyourhome.com http://piecedpastimes.blogspot.com/ http://rosevignettes.blogspot.com/2014/02/fresh-cut-friday-february.html